Learn Astrophotography
In short:
Bought my first camera in New Zealand in 2018 after seeing a friend's Milky Way shots and thinking, I want to do that one day
Covid, lockdown, and a flight home to England's light-polluted skies put the dream on ice for years
Finally got the chance in Kyrgyzstan, a month-long expedition with British Exploring and genuinely dark skies
Learned the practical settings (tripod, manual focus, the right shutter speed and ISO) from the group
Turned out to be a communal, surprisingly simple activity once you'd got the settings right
How It Started
My love of photography started in 2018, living on Waiheke Island in New Zealand.
A friend from work, Rachel, was really into photography and we'd occasionally go on mini island photography trips together. She got some incredible shots of the Milky Way. I remember looking at them and thinking, one day I want to capture that too. So after a summer of waitressing at Mudbrick, I bought my first "proper camera" off Facebook Marketplace (a Sony A6000), paid for with the tips I'd saved up.
Two weeks later, covid hit. I went into lockdown, then had to fly home to England, where the stars are nowhere near as good. I used the camera for pictures of my pets and the odd walk, but the astro dream was put on the back burner. I tried a few times in my garden in Bristol, but the light pollution and poor choice of lens meant the shots didn't look great, and eventually I just forgot about it.
Fast forward a few years, and I volunteer as a social leader with British Exploring, a charity that takes young people on expeditions to build leadership skills and get them outdoors. I signed up for my first international expedition, a month in Kyrgyzstan. I knew the stars out there would be incredible, so I figured it would be the perfect time to retry!
The Experience
I took the same Sony A6000 from New Zealand.
I'd brought the stock lens (35-50mm) and a lens I'd borrowed for the trip, which had a manual focus but a much lower aperture. That lower aperture made a huge difference when it came to actually capturing the stars.
Once you knew what you were doing, the settings were roughly this:
A tripod - essential!
Turn the camera to manual mode and manual focus
Shutter speed: 13-25 seconds (any longer and you start getting star trails instead of sharp stars)
Aperture: as low as your lens allows; mine was f1.4
ISO: 2000-2500 (too high and it'll look grainy, too low and it's just dark)
A 2-second shutter delay, so you're not blurring the shot every time you briefly knock the tripod when clicking the button.
The trickiest bit was focusing in the dark. The hack we used was focusing on the brightest star in the sky (if all you can see is a red or blue dot, your lens cap is still on ). Failing that, you could focus using the bulb mode, then switch back to your settings once it got dark, as long as nobody moved the camera in between.
Two others in the group were also into photography, so we ended up spending a fair few evenings out capturing the stars/ milky way together.
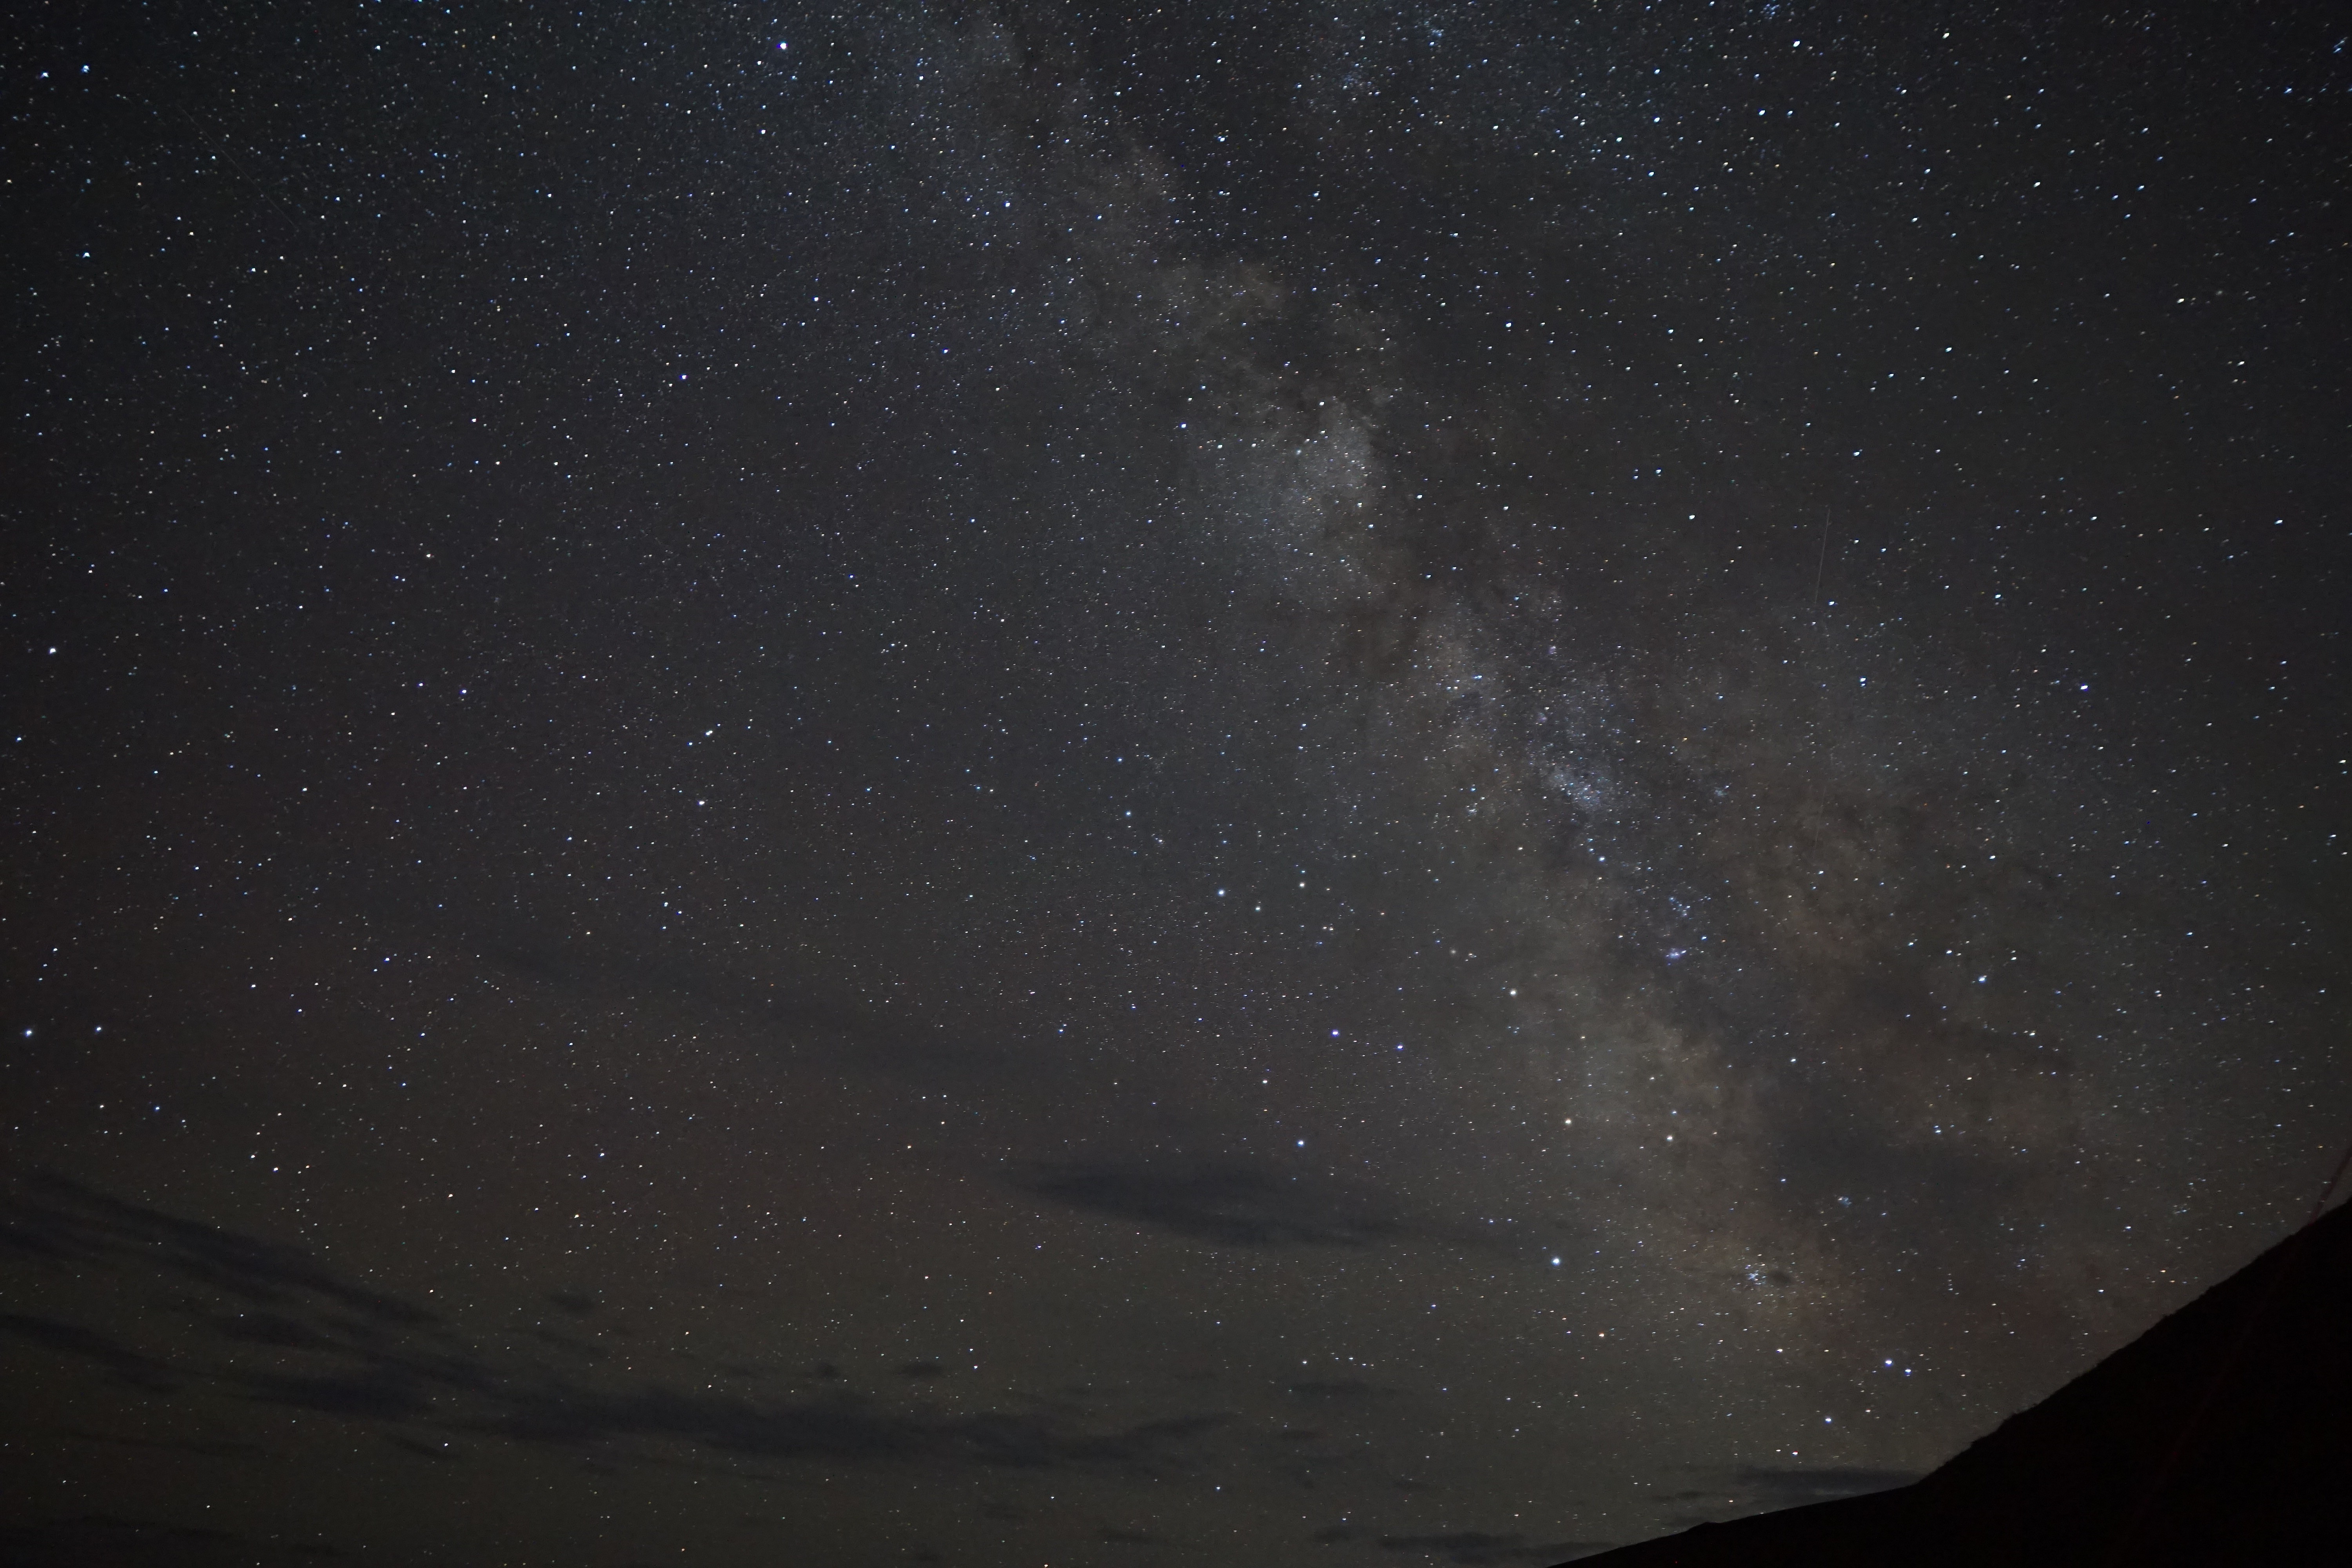
Once you'd got the lens focused and the settings right, it was surprisingly simple. Just point and shoot. It turned into a pretty communal activity, and it was so cool seeing everyone's different shots of the same sky.
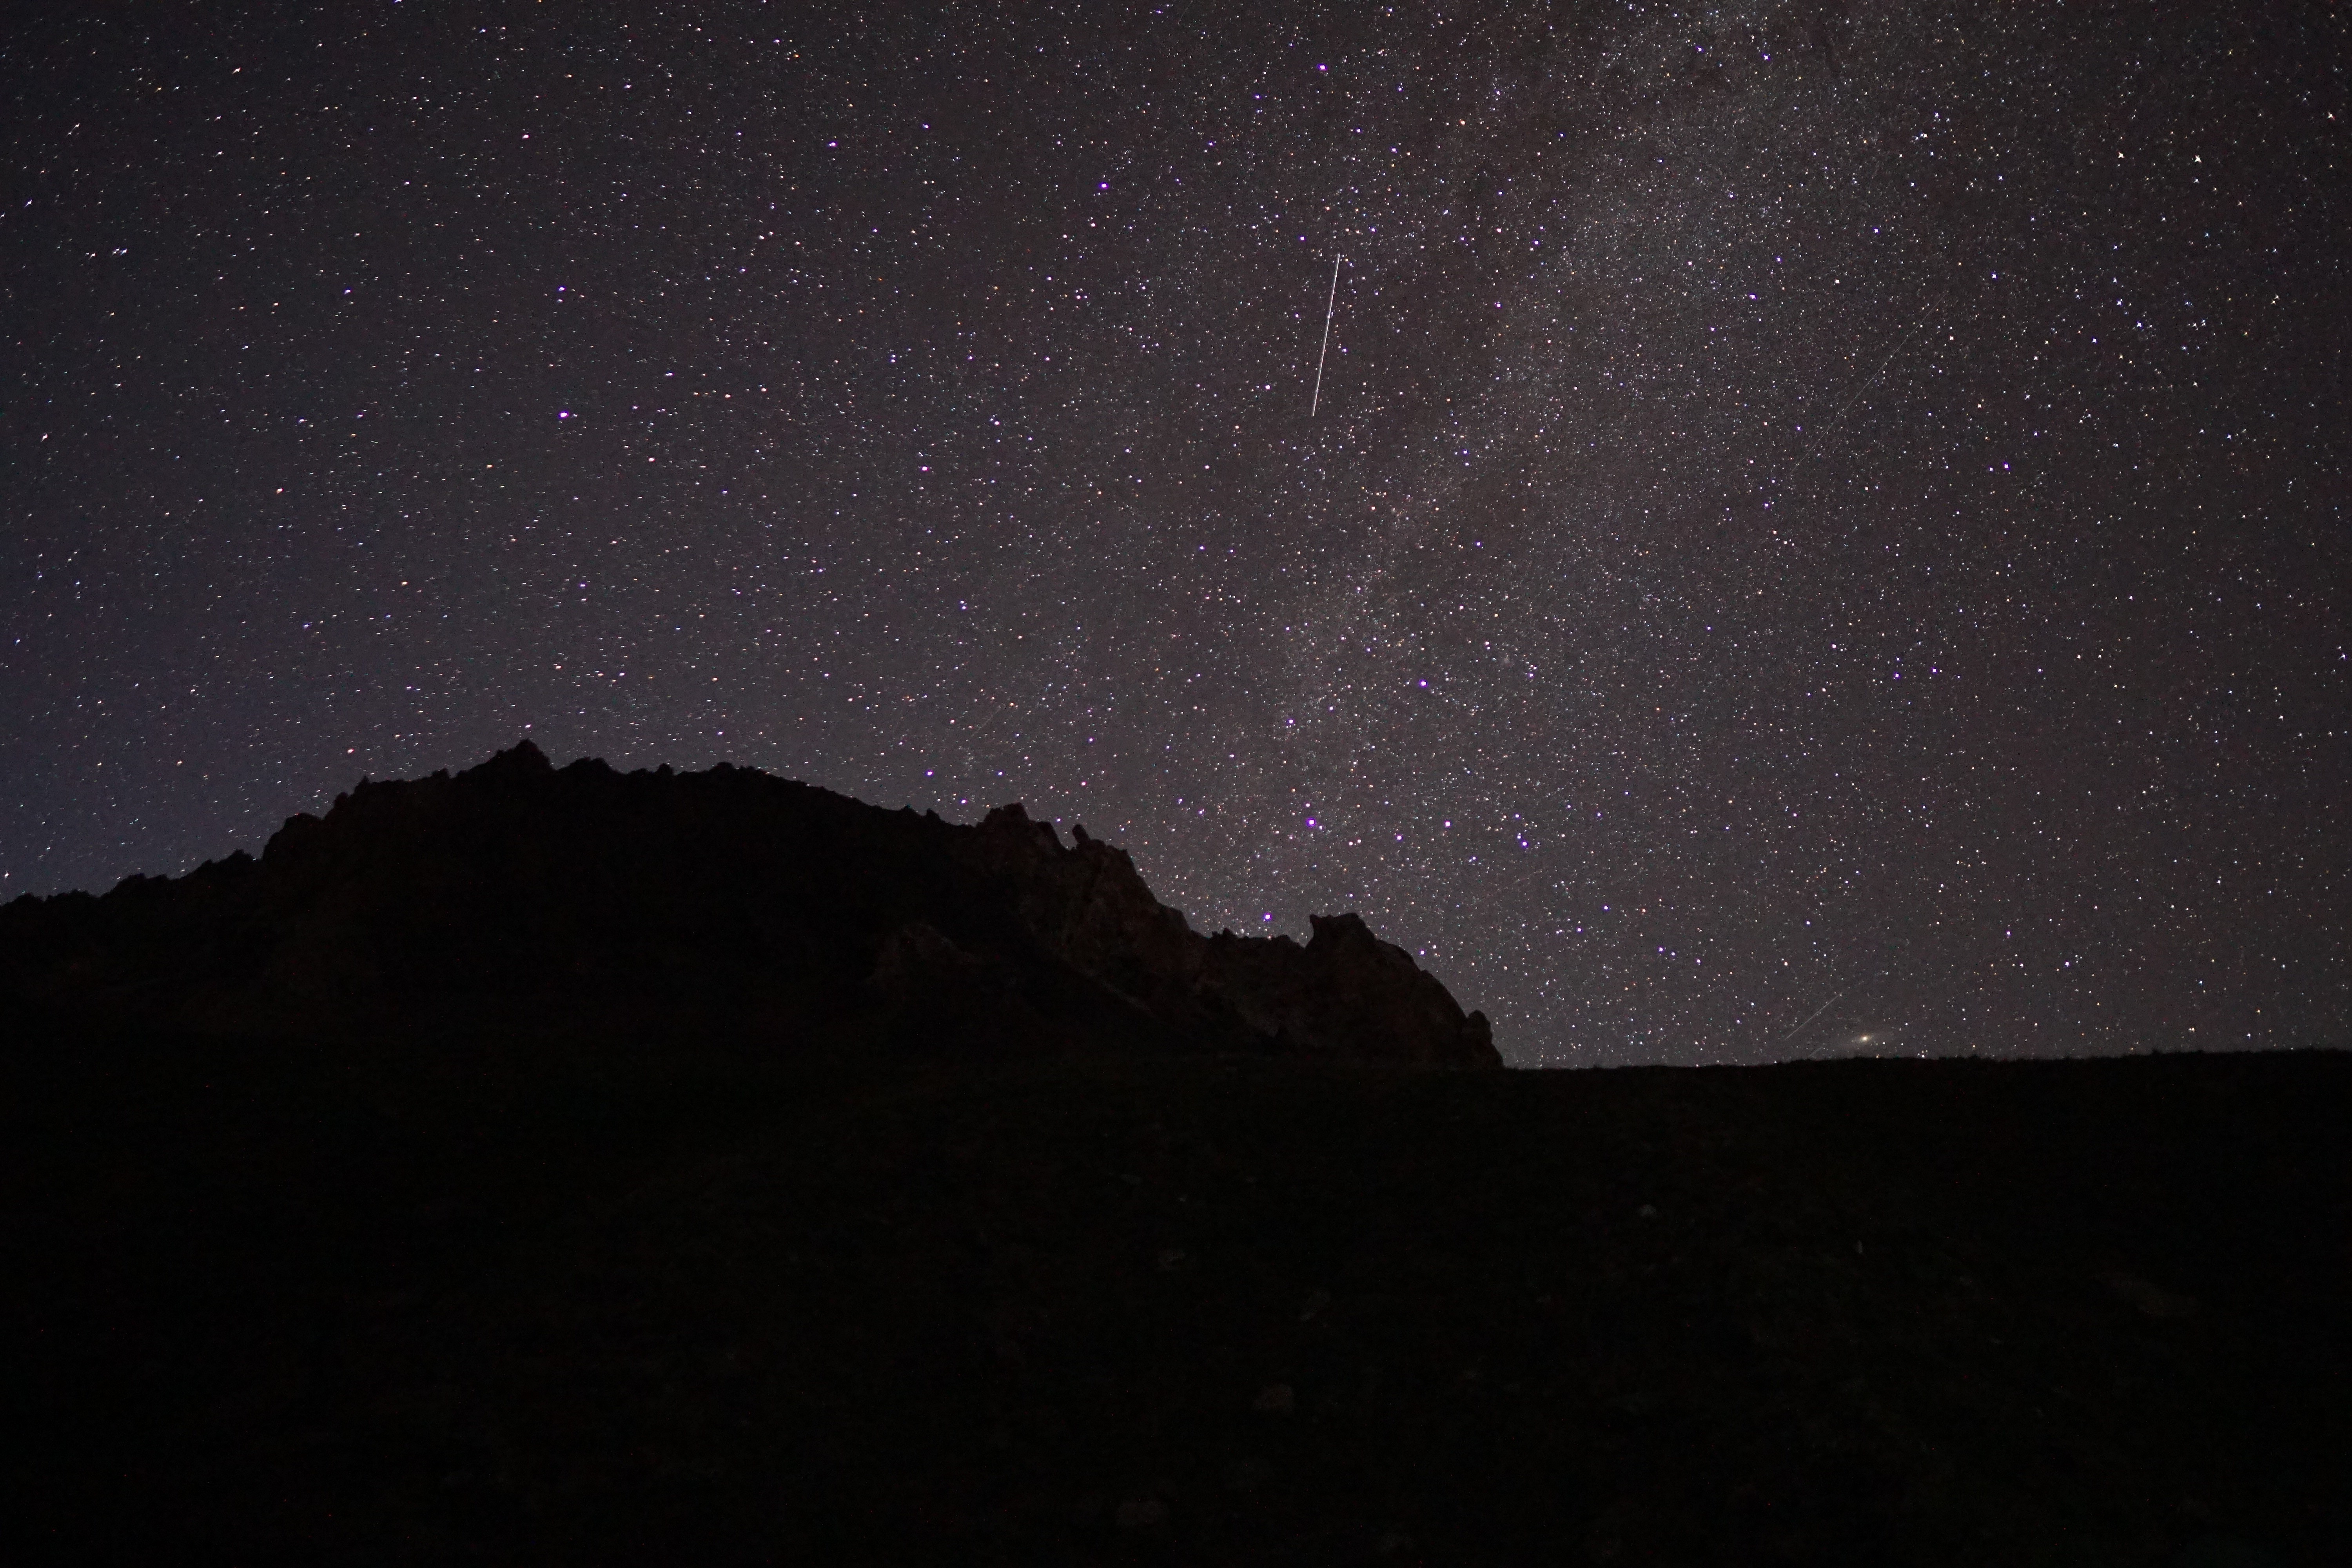
I get cold easily, so I didn't always stay out as long as the others. But I got some genuinely great shots, the ones I'd been hoping for since New Zealand.
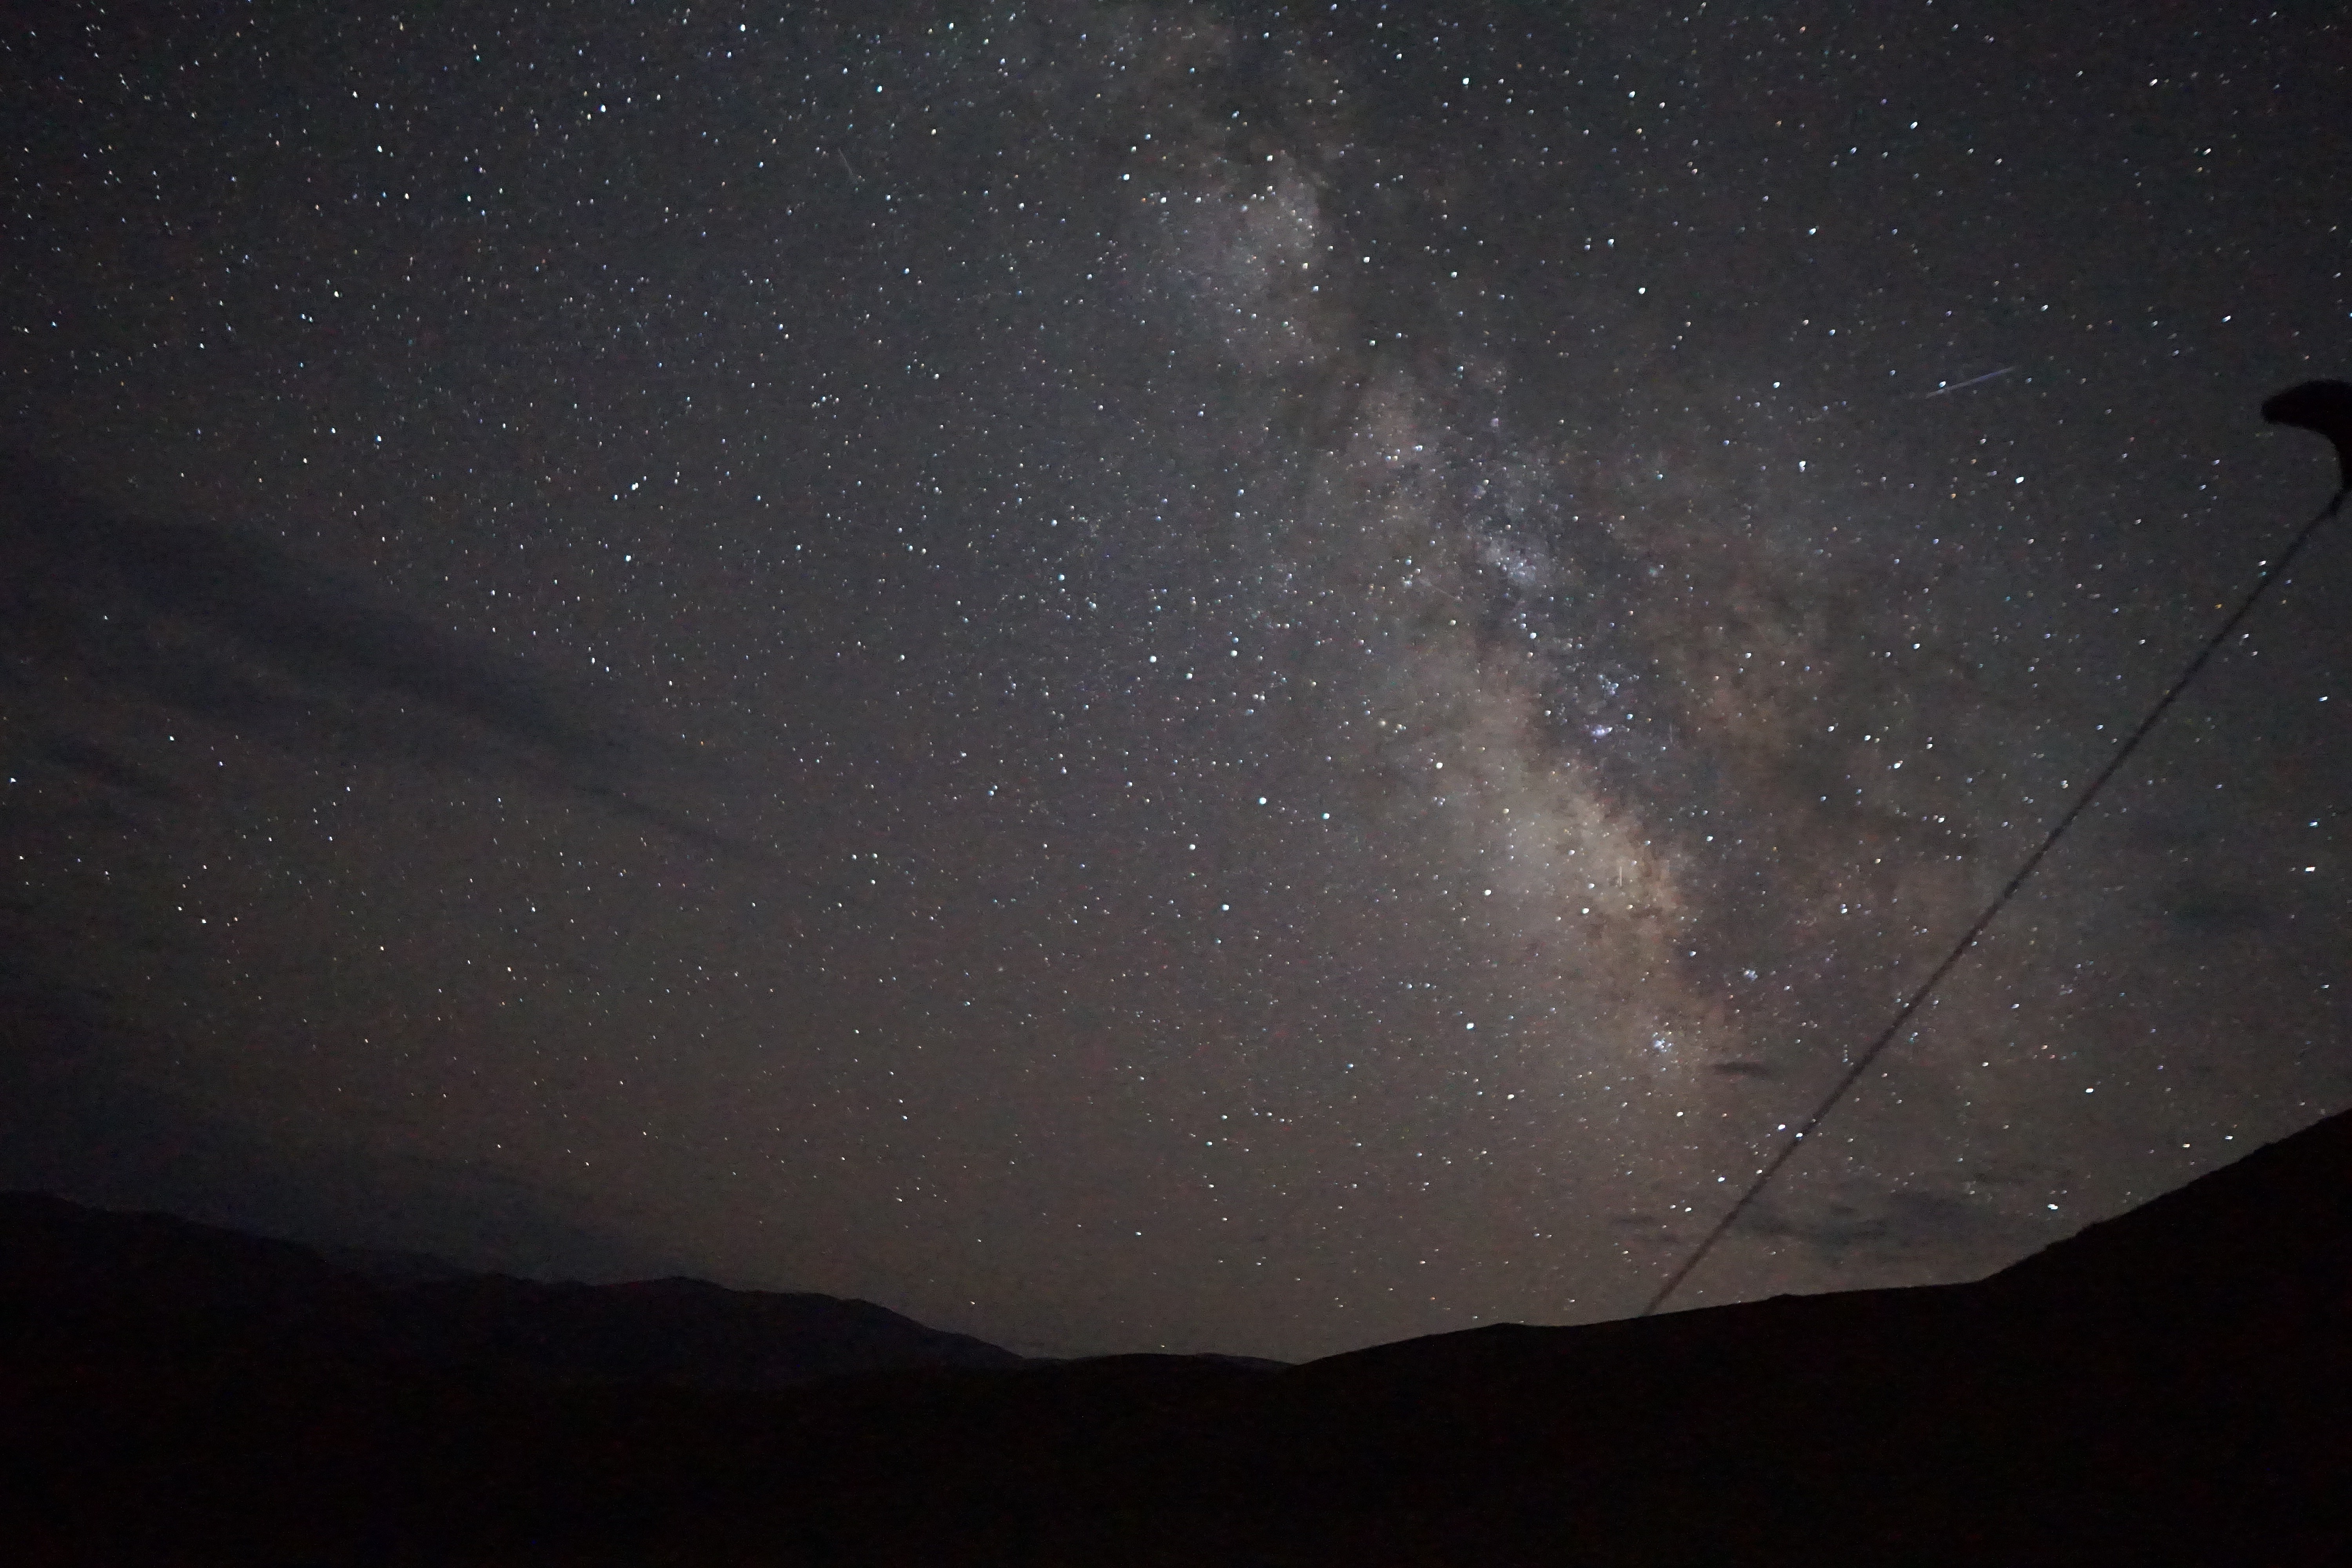
We were also lucky enough to catch a meteor shower while we were out there. About 20 shooting stars. I didn't try to photograph it (I just wanted to watch), but a couple of others in the group got some brilliant pictures. I was also surprised at how many satellites there were!
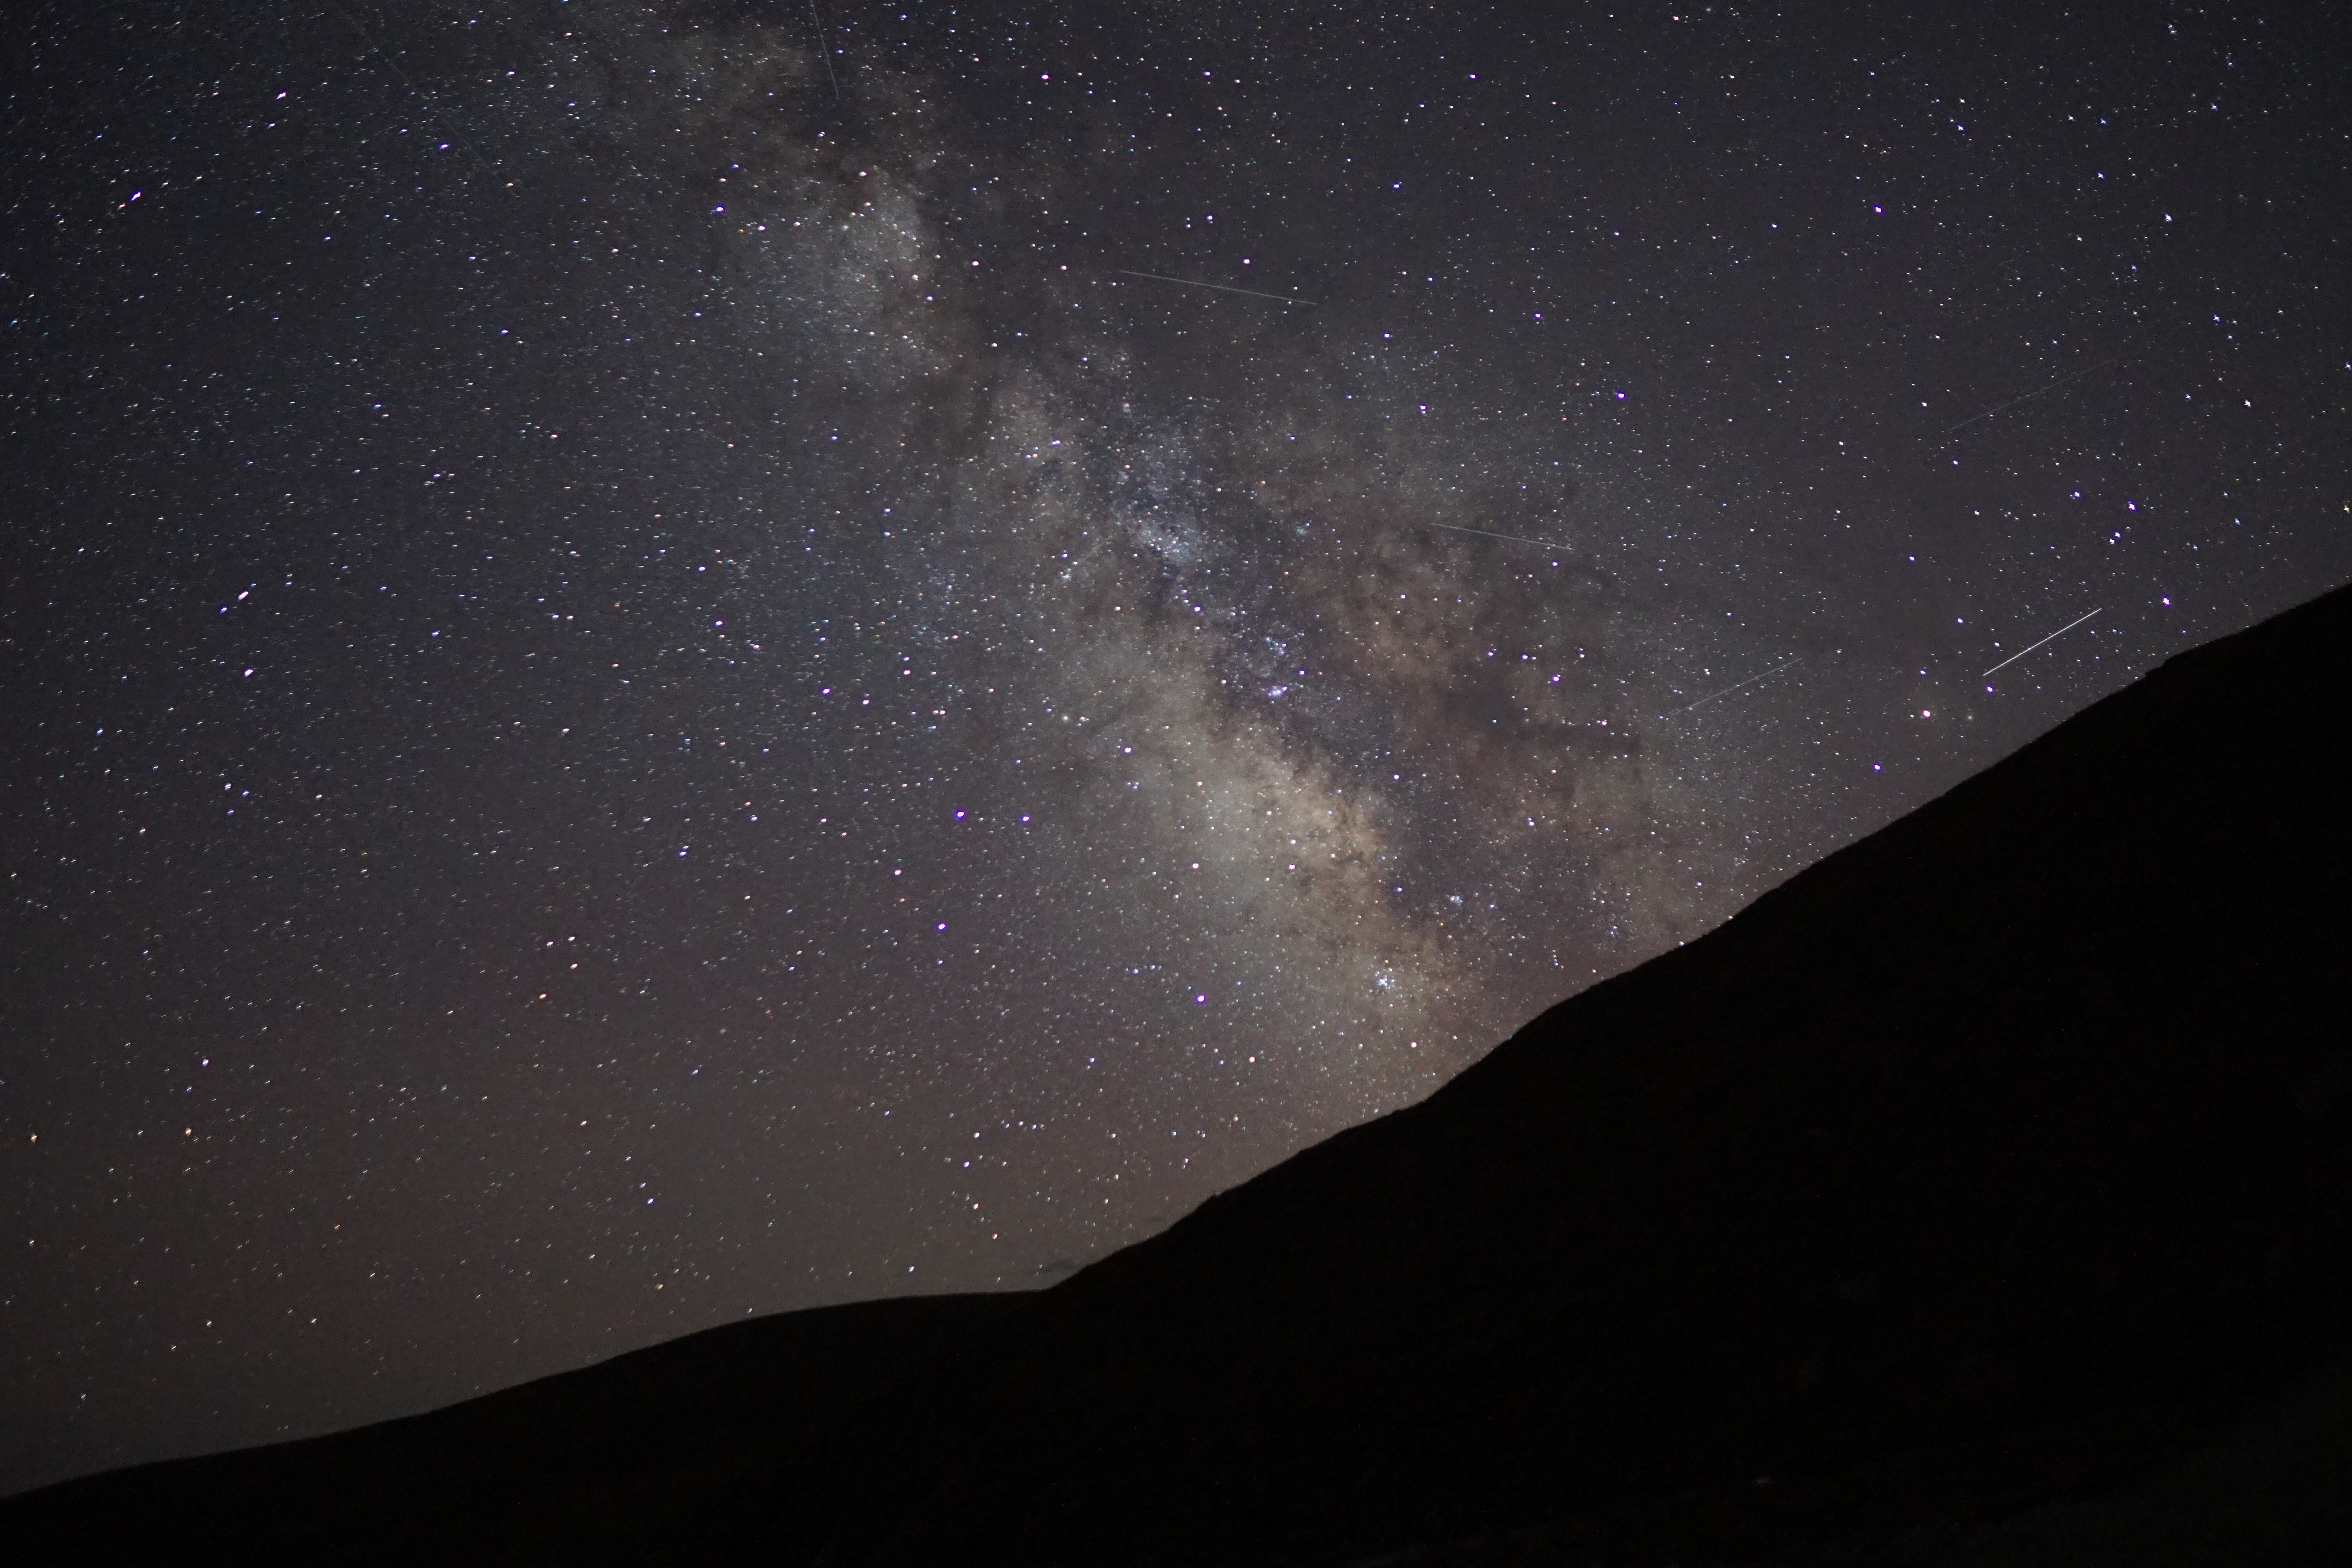
I learned loads about photography on that trip. I'm a lot more confident now knowing where the settings actually live and what each one does.
What I Took Away
It's worth getting a rough idea of your settings before you head out, and actually practising finding them on your camera during the day. I leaned on group knowledge out there, but there are some great YouTube videos too, and if you've got a Sony camera, they do their own how-to guides on the camera.
Lenses can be seriously expensive, but they make a huge difference. The shots I took on my stock lens versus the ones with the lower aperture were completely different. Before you go buying anything, it's worth asking around- friends, family, local camera shops- to see if there's a lens you can borrow. Much cheaper, especially if you're not sure how often you'll actually get out and use it.
I really enjoyed it, and loved looking back through the end results. The foreground (mountains, trees, that kind of thing) makes a big difference to the kind of shots you get, since the stars themselves don't move much. Beyond changing angles or trying to catch a shooting star, there wasn't as much variety in the shots as I'd expected.
Special Thanks to:
Dad for sharing his love of photography with me from a young age.
Rachel for inspiring me to get my camera in NZ
Dan, for lending me the lens that made this whole thing possible.
British Exploring and the 'Siesta Fiesta' group in Kyrgyzstan, for all their help and enthusiasm!
Learn Astrophotography
In short:
Bought my first camera in New Zealand in 2018 after seeing a friend's Milky Way shots and thinking, I want to do that one day
Covid, lockdown, and a flight home to England's light-polluted skies put the dream on ice for years
Finally got the chance in Kyrgyzstan, a month-long expedition with British Exploring and genuinely dark skies
Learned the practical settings (tripod, manual focus, the right shutter speed and ISO) from the group
Turned out to be a communal, surprisingly simple activity once you'd got the settings right
How It Started
My love of photography started in 2018, living on Waiheke Island in New Zealand.
A friend from work, Rachel, was really into photography and we'd occasionally go on mini island photography trips together. She got some incredible shots of the Milky Way. I remember looking at them and thinking, one day I want to capture that too. So after a summer of waitressing at Mudbrick, I bought my first "proper camera" off Facebook Marketplace (a Sony A6000), paid for with the tips I'd saved up.
Two weeks later, covid hit. I went into lockdown, then had to fly home to England, where the stars are nowhere near as good. I used the camera for pictures of my pets and the odd walk, but the astro dream was put on the back burner. I tried a few times in my garden in Bristol, but the light pollution and poor choice of lens meant the shots didn't look great, and eventually I just forgot about it.
Fast forward a few years, and I volunteer as a social leader with British Exploring, a charity that takes young people on expeditions to build leadership skills and get them outdoors. I signed up for my first international expedition, a month in Kyrgyzstan. I knew the stars out there would be incredible, so I figured it would be the perfect time to retry!
The Experience
I took the same Sony A6000 from New Zealand.
I'd brought the stock lens (35-50mm) and a lens I'd borrowed for the trip, which had a manual focus but a much lower aperture. That lower aperture made a huge difference when it came to actually capturing the stars.
Once you knew what you were doing, the settings were roughly this:
A tripod - essential!
Turn the camera to manual mode and manual focus
Shutter speed: 13-25 seconds (any longer and you start getting star trails instead of sharp stars)
Aperture: as low as your lens allows; mine was f1.4
ISO: 2000-2500 (too high and it'll look grainy, too low and it's just dark)
A 2-second shutter delay, so you're not blurring the shot every time you briefly knock the tripod when clicking the button.
The trickiest bit was focusing in the dark. The hack we used was focusing on the brightest star in the sky (if all you can see is a red or blue dot, your lens cap is still on ). Failing that, you could focus using the bulb mode, then switch back to your settings once it got dark, as long as nobody moved the camera in between.
Two others in the group were also into photography, so we ended up spending a fair few evenings out capturing the stars/ milky way together.
Once you'd got the lens focused and the settings right, it was surprisingly simple. Just point and shoot. It turned into a pretty communal activity, and it was so cool seeing everyone's different shots of the same sky.
I get cold easily, so I didn't always stay out as long as the others. But I got some genuinely great shots, the ones I'd been hoping for since New Zealand.
We were also lucky enough to catch a meteor shower while we were out there. About 20 shooting stars. I didn't try to photograph it (I just wanted to watch), but a couple of others in the group got some brilliant pictures. I was also surprised at how many satellites there were!
I learned loads about photography on that trip. I'm a lot more confident now knowing where the settings actually live and what each one does.
What I Took Away
It's worth getting a rough idea of your settings before you head out, and actually practising finding them on your camera during the day. I leaned on group knowledge out there, but there are some great YouTube videos too, and if you've got a Sony camera, they do their own how-to guides on the camera.
Lenses can be seriously expensive, but they make a huge difference. The shots I took on my stock lens versus the ones with the lower aperture were completely different. Before you go buying anything, it's worth asking around- friends, family, local camera shops- to see if there's a lens you can borrow. Much cheaper, especially if you're not sure how often you'll actually get out and use it.
I really enjoyed it, and loved looking back through the end results. The foreground (mountains, trees, that kind of thing) makes a big difference to the kind of shots you get, since the stars themselves don't move much. Beyond changing angles or trying to catch a shooting star, there wasn't as much variety in the shots as I'd expected.
Special Thanks to:
Dad for sharing his love of photography with me from a young age.
Rachel for inspiring me to get my camera in NZ
Dan, for lending me the lens that made this whole thing possible.
British Exploring and the 'Siesta Fiesta' group in Kyrgyzstan, for all their help and enthusiasm!